Action disabled: source
munis:requisition_entry
Requisition Entry
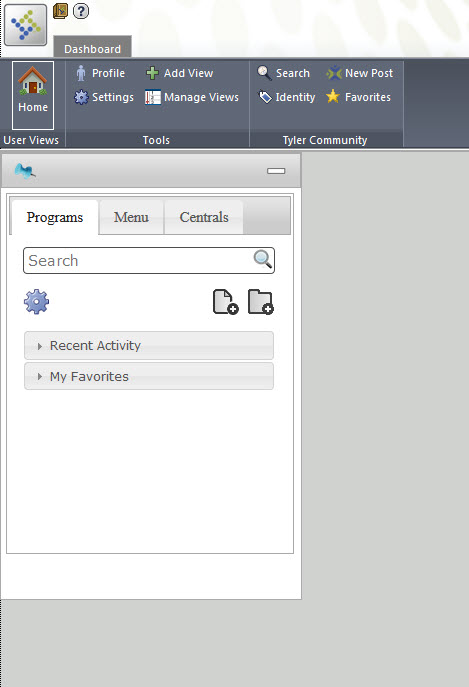
- This is the main screen you will see when you first login to Munis:
- Click on the Menu tab:
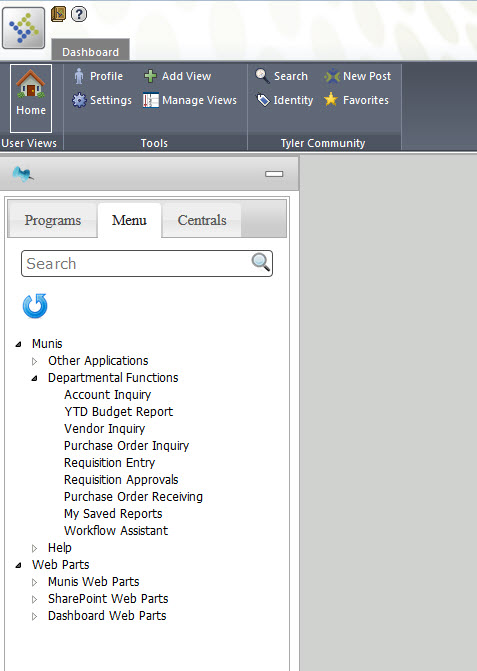
- Expand the menu for Munis and then Departmental Functions and then click on Requisition Entry
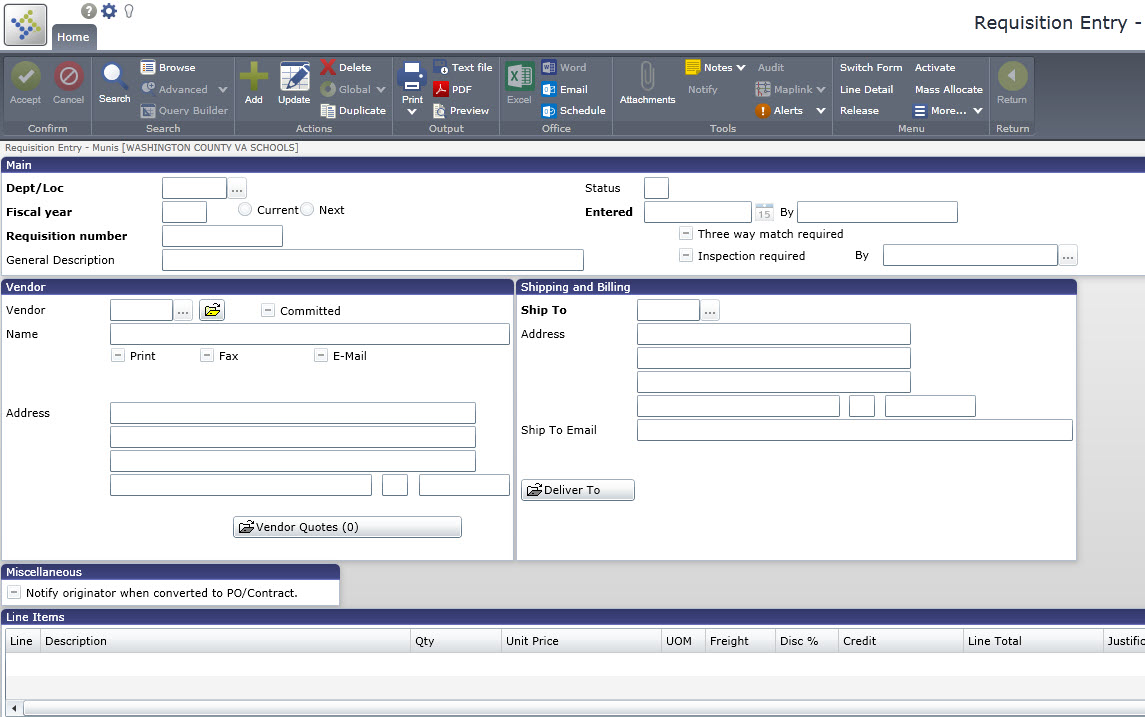
- You will see a blank Requisition Entry form. Click on the Add button at the top to enter a new requisition:
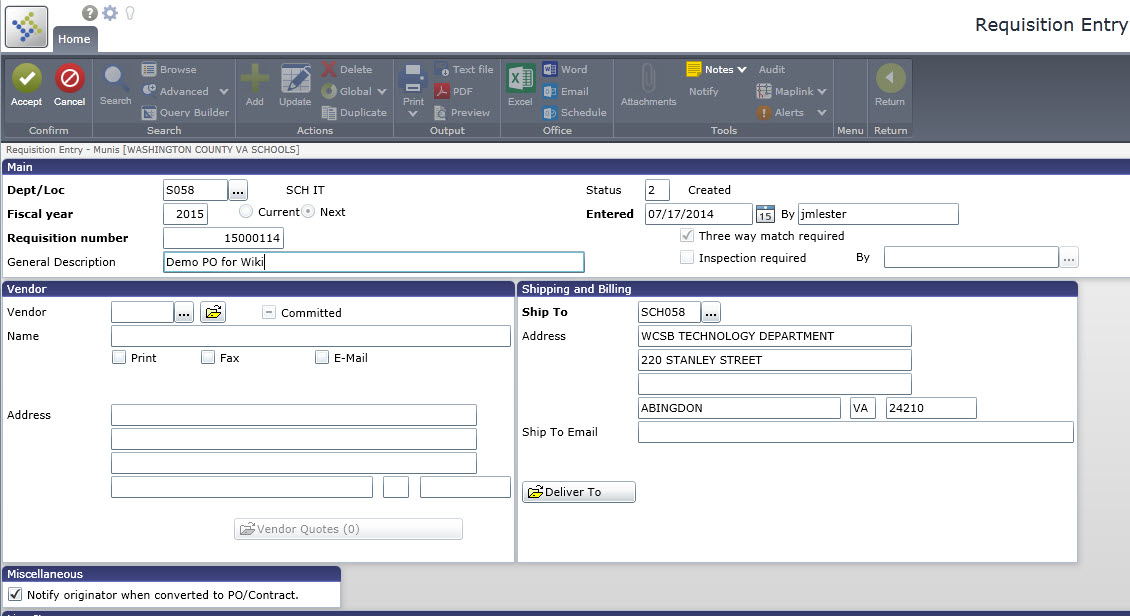
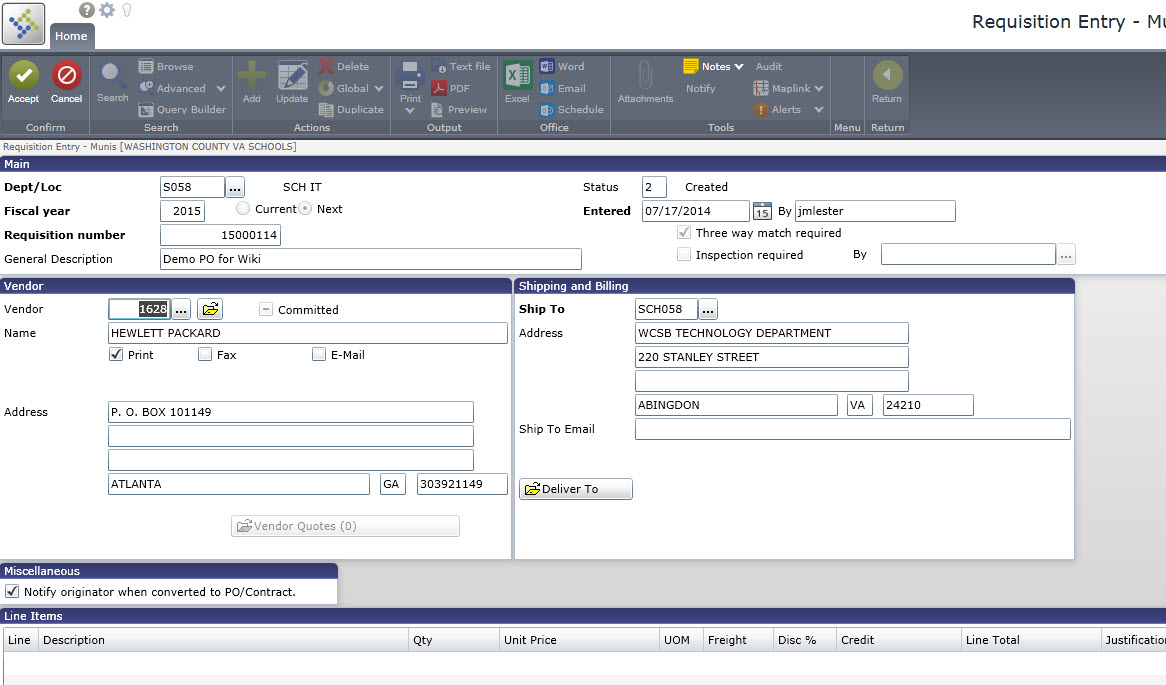
- After clicking Add, the system should automatically set your default Department/Location code. Make sure the Fiscal Year is set to the current year:

- The system will automatically populate the Requisition Number field for you. Enter a short description related to what you are ordering in the General Description box:
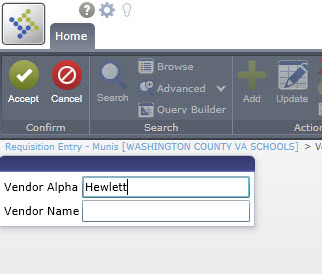
- Click the small ellipses button (the three dots) beside the Vendor field to search for the correct vendor.
- Type the beginning portion of the vendor's name and click Accept.
- The system will return all matching vendors:
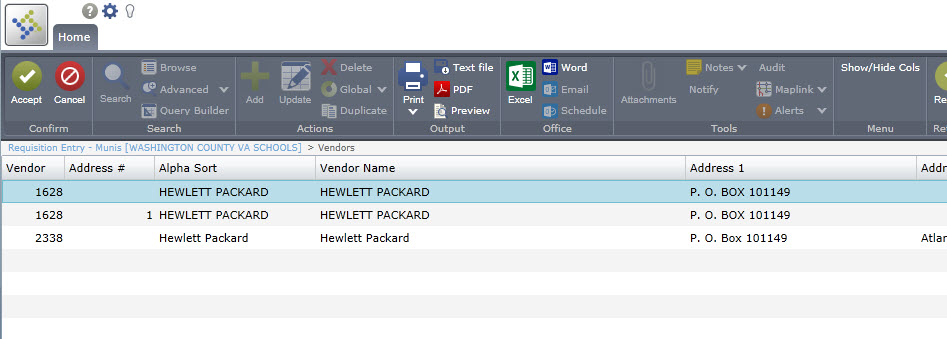
- Choose the proper vendor and click Accept. If the vendor is not listed, you will need to contact Pam Jones to get her to add them as a new vendor.
- The screen should now show the requisition along with the selected vendor's information. Make sure the Ship To address is correct and then click Accept.
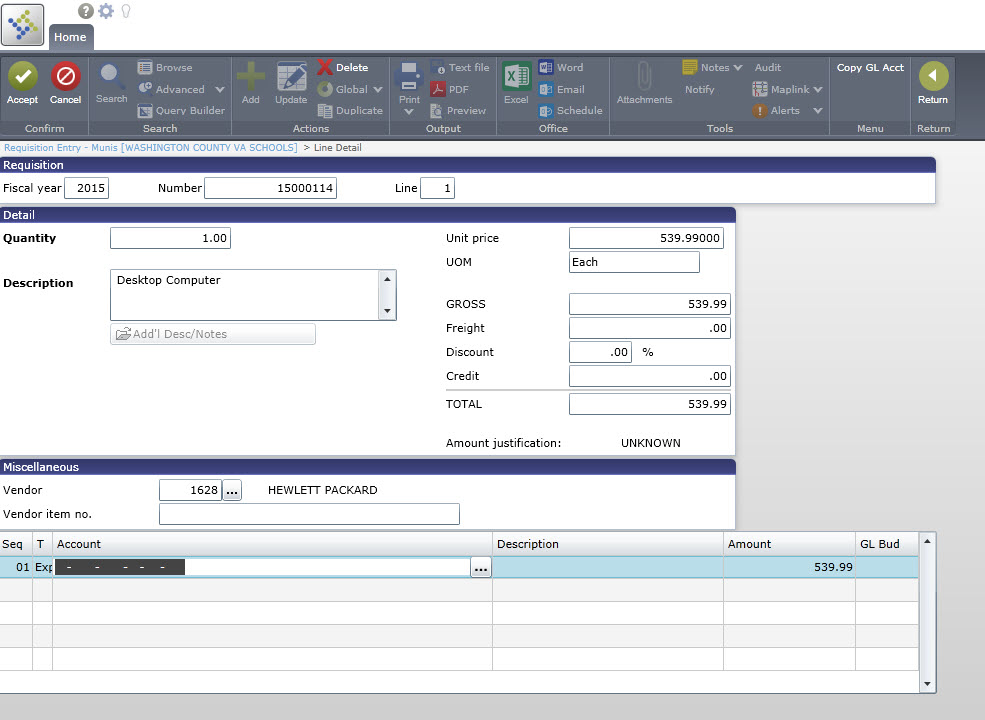
- Munis will now take you to the entry screen for the first line on the requisition. If this is a blanket requisition/PO, follow the instructions here: Blanket PO / Requisition. Enter the Quantity, Description, Unit Price, and Freight (if applicable).
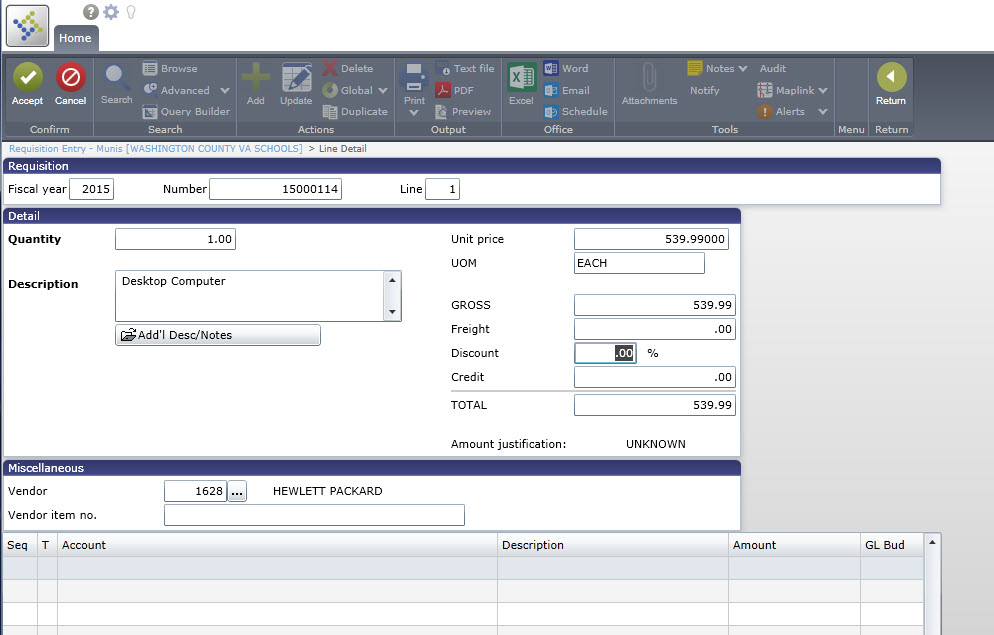
- You will need to tell what account code this line will be charged against. Click under Seq to start a blank entry:
- Click the ellipses beside Account to bring up a list of all your accounts (numbers redacted in this screenshot):
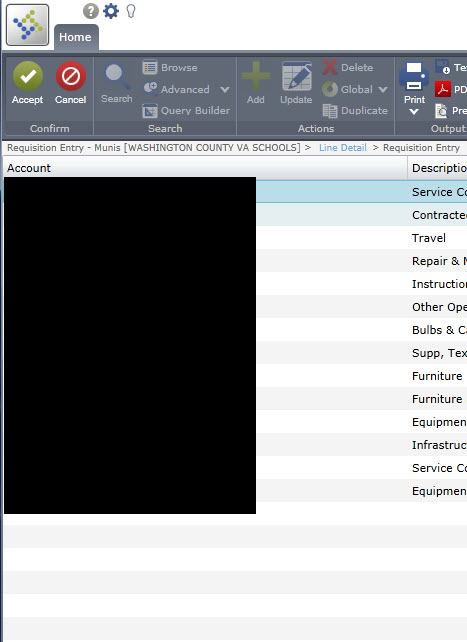
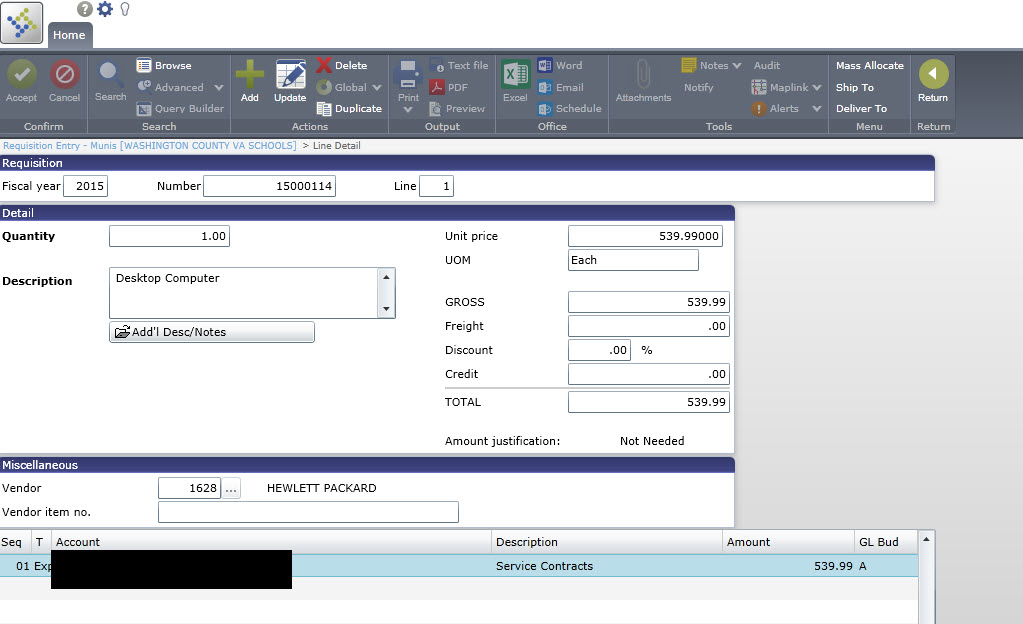
- Choose the correct account and click Accept. You can tell it how much to code to that account in case you need to split it among multiple accounts. You can add another line if so by repeating the previous step.
- Click Accept to complete this line on the requisition.
- Click the Add button again if you want to enter additional lines on this requisition. You will see the Line box increment to the next number each time you add a line:
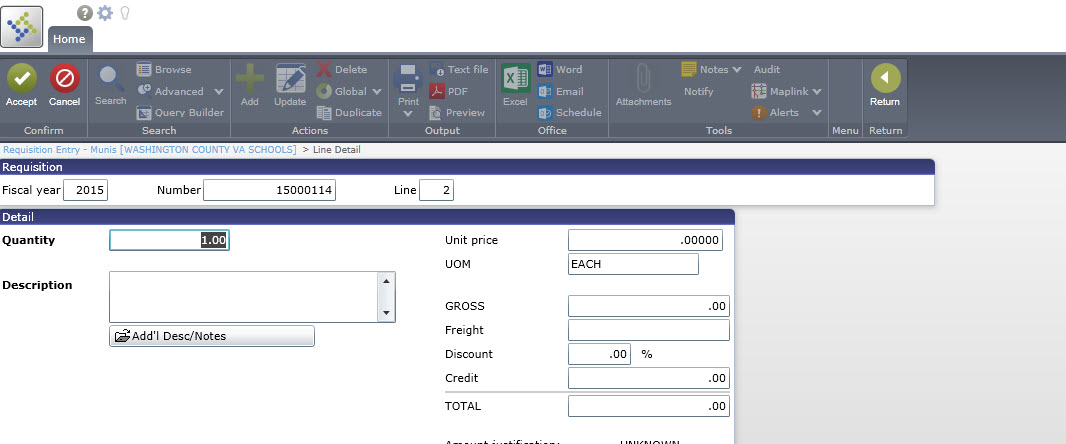
- Once you are finished entering all the lines, click Return to go back to the requisition screen.
- Once the requisition is entered with all the information correct, click Release to start the approval process.
Notes
- If you accidentally leave out of the Line screen and need to add more lines to a requisition, click the Line Detail button at the top of the requisition screen. You can then click Add to add additional lines.
munis/requisition_entry.txt · Last modified: 2014/07/21 12:25 by jlester